Lengthening or shortening a pattern
Inhaltsverzeichnis
You want to lengthen or shorten a blouse, shirt, or dress??
In this guide, I’ll show you how to easily adjust the length of your pattern before cutting the fabric.
Determine the Desired Length
 First, determine the desired length by measuring yourself. Place the measuring tape on your shoulder and measure down to the length you want. Don’t forget to add the hem allowance to the measured length.
Lengthen a pattern
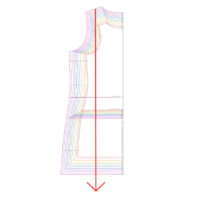
Transfer the determined length onto the pattern pieces for both the front and back. Place the measuring tape at the center of the shoulder seam on the pattern piece and measure down to the desired length.
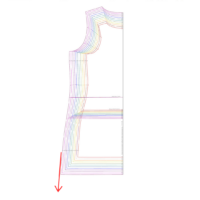
Extend the outer edges (side seams) according to the pattern lines to match the desired length.
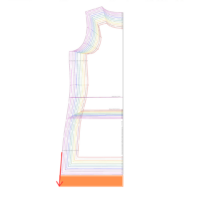
Tip: You can mark the additional length directly on the fabric. If you plan to use the pattern multiple times, it’s a good idea to attach additional sheets to the pattern and cut out the extended cutting line, so you won’t need to measure again next time.
Do this for both the front and back pieces of the pattern, and don’t forget to add the hem allowance when cutting the fabric.
The pattern extension is now complete, and you can transfer it onto the fabric and cut it out.
Shorten a pattern
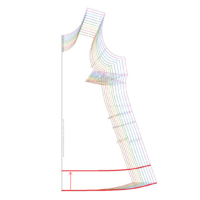 If you want to shorten your pattern, first measure yourself as described above to determine the desired length.
Then, shorten the pattern at the hem of the pattern piece by the desired length.
For straight-cut pattern pieces, you can simply trim off the excess length at the hemline.
If the garment is flared as shown in the image above and/or has a curved hemline, you can maintain the shape of the hem by shortening parallel to the original hemline.
Do this for both the front and back pieces of the pattern, and don’t forget to add the hem allowance when cutting the fabric.
